Designing an Item
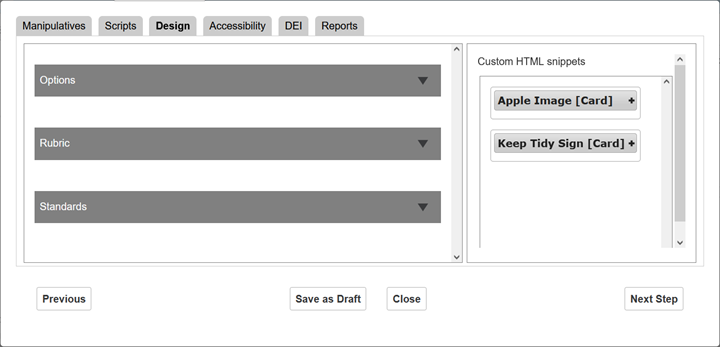
The Design tab (Figure 262) is where you can construct the item in the Options, Rubric, and Standards sections on the left. You can use manipulatives from the Custom HTML Snippets section on the right.
Figure 262: Alternate Assessment Document Editor Window: Design Tab
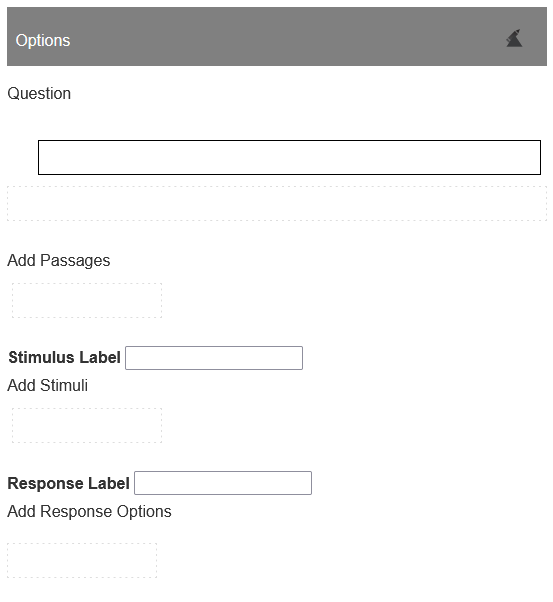
1.Click the Options section on the left to expand it, as in Figure 263. Then do any of the following:
-
To add prompts, enter them in the CKEditor(s) in the Question section. For help using the CKEditor, refer to Appendix A. When necessary, create a new prompt by clicking in the box with the dotted line. The prompts will appear in the DEI, and depending on the item type, they may also appear in the testing booklet. Writing items typically have more than one prompt.
Figure 263: Alternate Assessment Document Editor Window: Design Tab: Options Section
-
To add passages, perform the following steps and repeat as necessary:
i.Click in a box in the Add Passages section. Drag and drop a manipulative into the passage element that appears.
ii.Mark the Illustration checkbox if a passage serves as an illustration. This is important because when the testing booklet refers the TA to the page in the passage booklet, it will not use the page number of an illustration appearing on a different page from the main passage.
-
To add stimuli, perform the following steps and repeat as necessary:
i.Enter a label for all the stimuli in the Stimulus Label field. This label will appear in the list of materials in the TA’s testing booklet.
ii.Click in the Add Stimuli box. Drag and drop a manipulative into the stimulus element that appears.
iii.Mark the Cutout checkbox if a response option should be cut out rather than included in the response booklet.
-
To add response options, perform the following steps and repeat as necessary:
i.Enter a label for all the response options in the Response Label field. This label will appear in the list of materials in the TA’s testing booklet.
ii.Click in the Add Response Options box. Drag and drop a manipulative into the response option element that appears.
iii.For a Choice item, mark the Correct checkbox for a correct option.
iv.Optional: Mark the Cutout checkbox if a response option should be cut out rather than included in the response booklet.
-
To reorder passages, stimuli, or response options, hover over them and use the drag-and-drop handles
 . This sets the order in which they will appear in the booklet.
 -
To remove a passage, stimulus, or response option, hover over them and click the delete option button
 .
.
2.Click the Rubric section below the Options section to expand it, as in Figure 264. Then follow the steps below:
a.Optional: Make a selection from the Scoring Template drop-down list. It is usually set to Default. Note that changing your selection overwrites any existing content.
Figure 264: Alternate Assessment Document Editor Window: Design Tab: Rubric Section
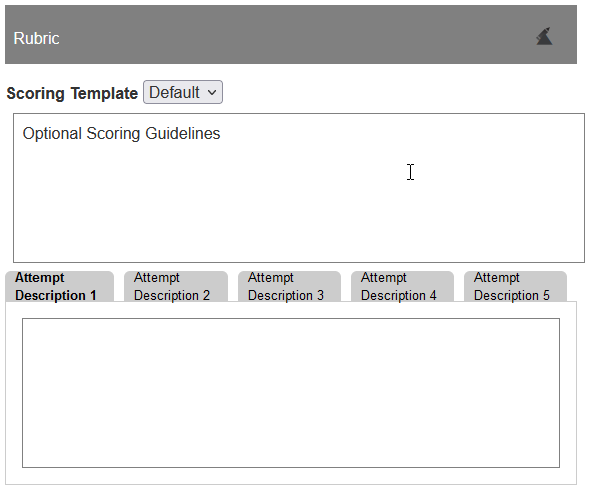
Figure 265: Alternate Assessment Document Editor Window: Design Tab: Detail of Rubric Section
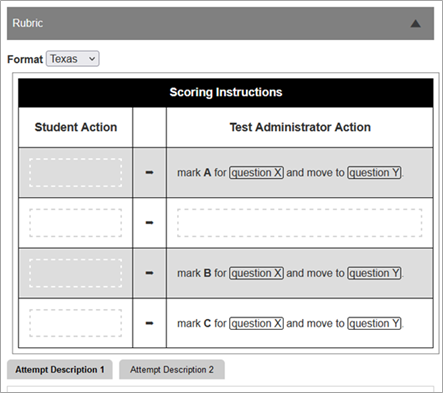
b.Below the Format drop-down list, depending on whether there appears a single text box (as in Figure 264) or a preset table of scoring instructions (as in Figure 265), do one of the following. (For help using the CKEditor, refer to Appendix A.)
-
In the text box, optionally enter information about evaluating the student’s response. For example, describe a fully correct response. This will appear in the TA’s testing booklet and is most helpful for Custom type items, not Choice ones.
-
In the table of scoring instructions, edit the text in the fields surrounded by dotted lines. This table will appear in the TA’s testing booklet.
c.In each of the Attempt Description tabs, use the text boxes to explain how to respond to the student’s attempts. For example, you can instruct the TA to respond to an incorrect first response with a hint. This information will appear in the TA’s testing booklet. Be sure to use the Alt script spoken and Alt script action styles where appropriate, as described in Creating a Script. For help using the CKEditor, refer to Appendix A.
3.Click the Standards section below the Rubric section to expand it, as in Figure 266. Then follow the steps below:
a.Click EDIT. The Make CSR Selections for Item section appears.
b.Follow steps 2–6 in Setting Standards.
Figure 266: Alternate Assessment Document Editor Window: Design Tab: Standards Section
4.To save your changes, click Save as Draft at the bottom of the window. Click OK in the confirmation pop-up.